Made this origami? Leave a comment & submit your photo here.
-
34
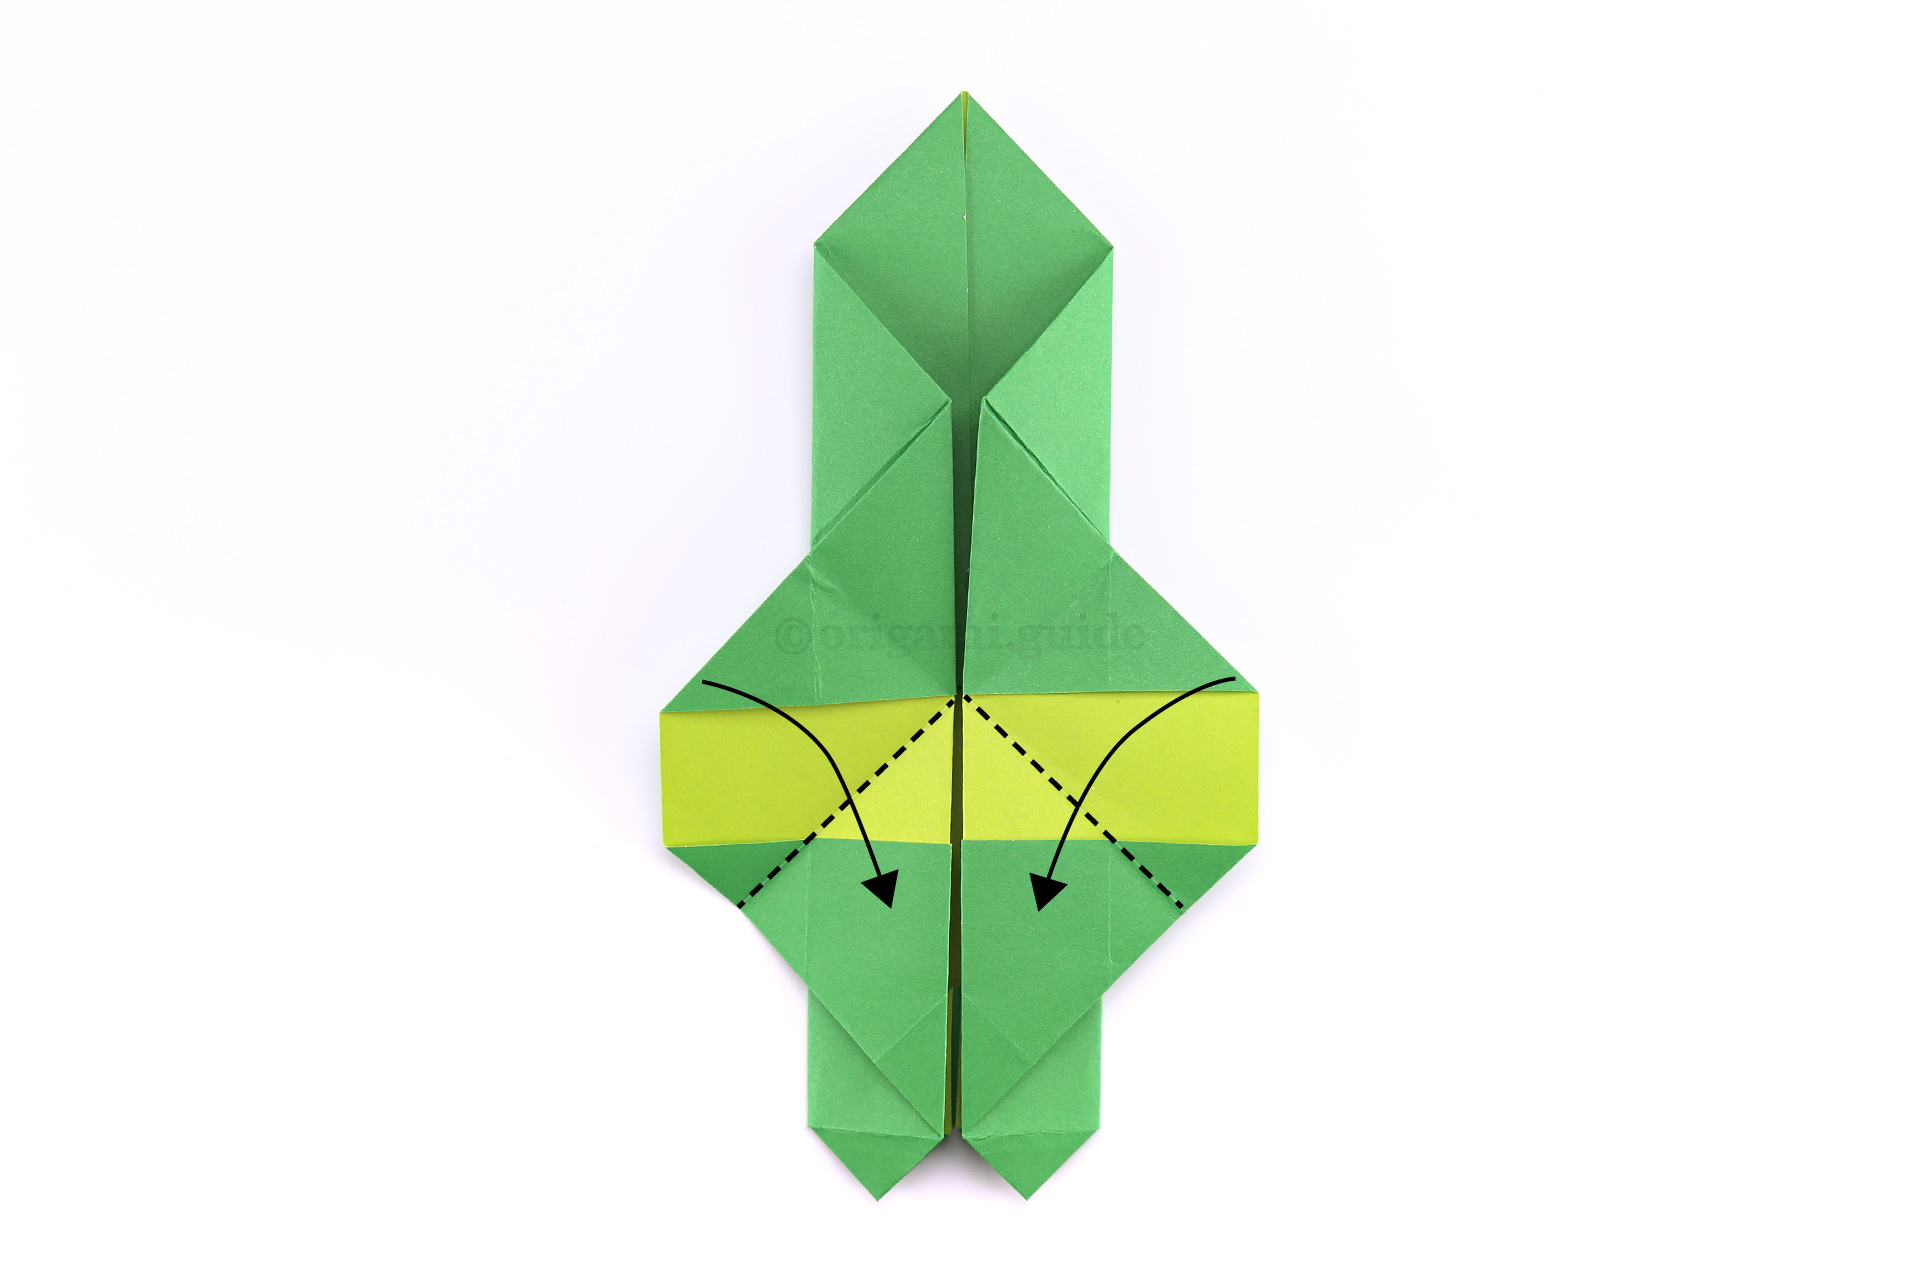
Step 34: Open the top back up and then bring the two front flaps diagonally inwards together, using the creases we just made.
-
35
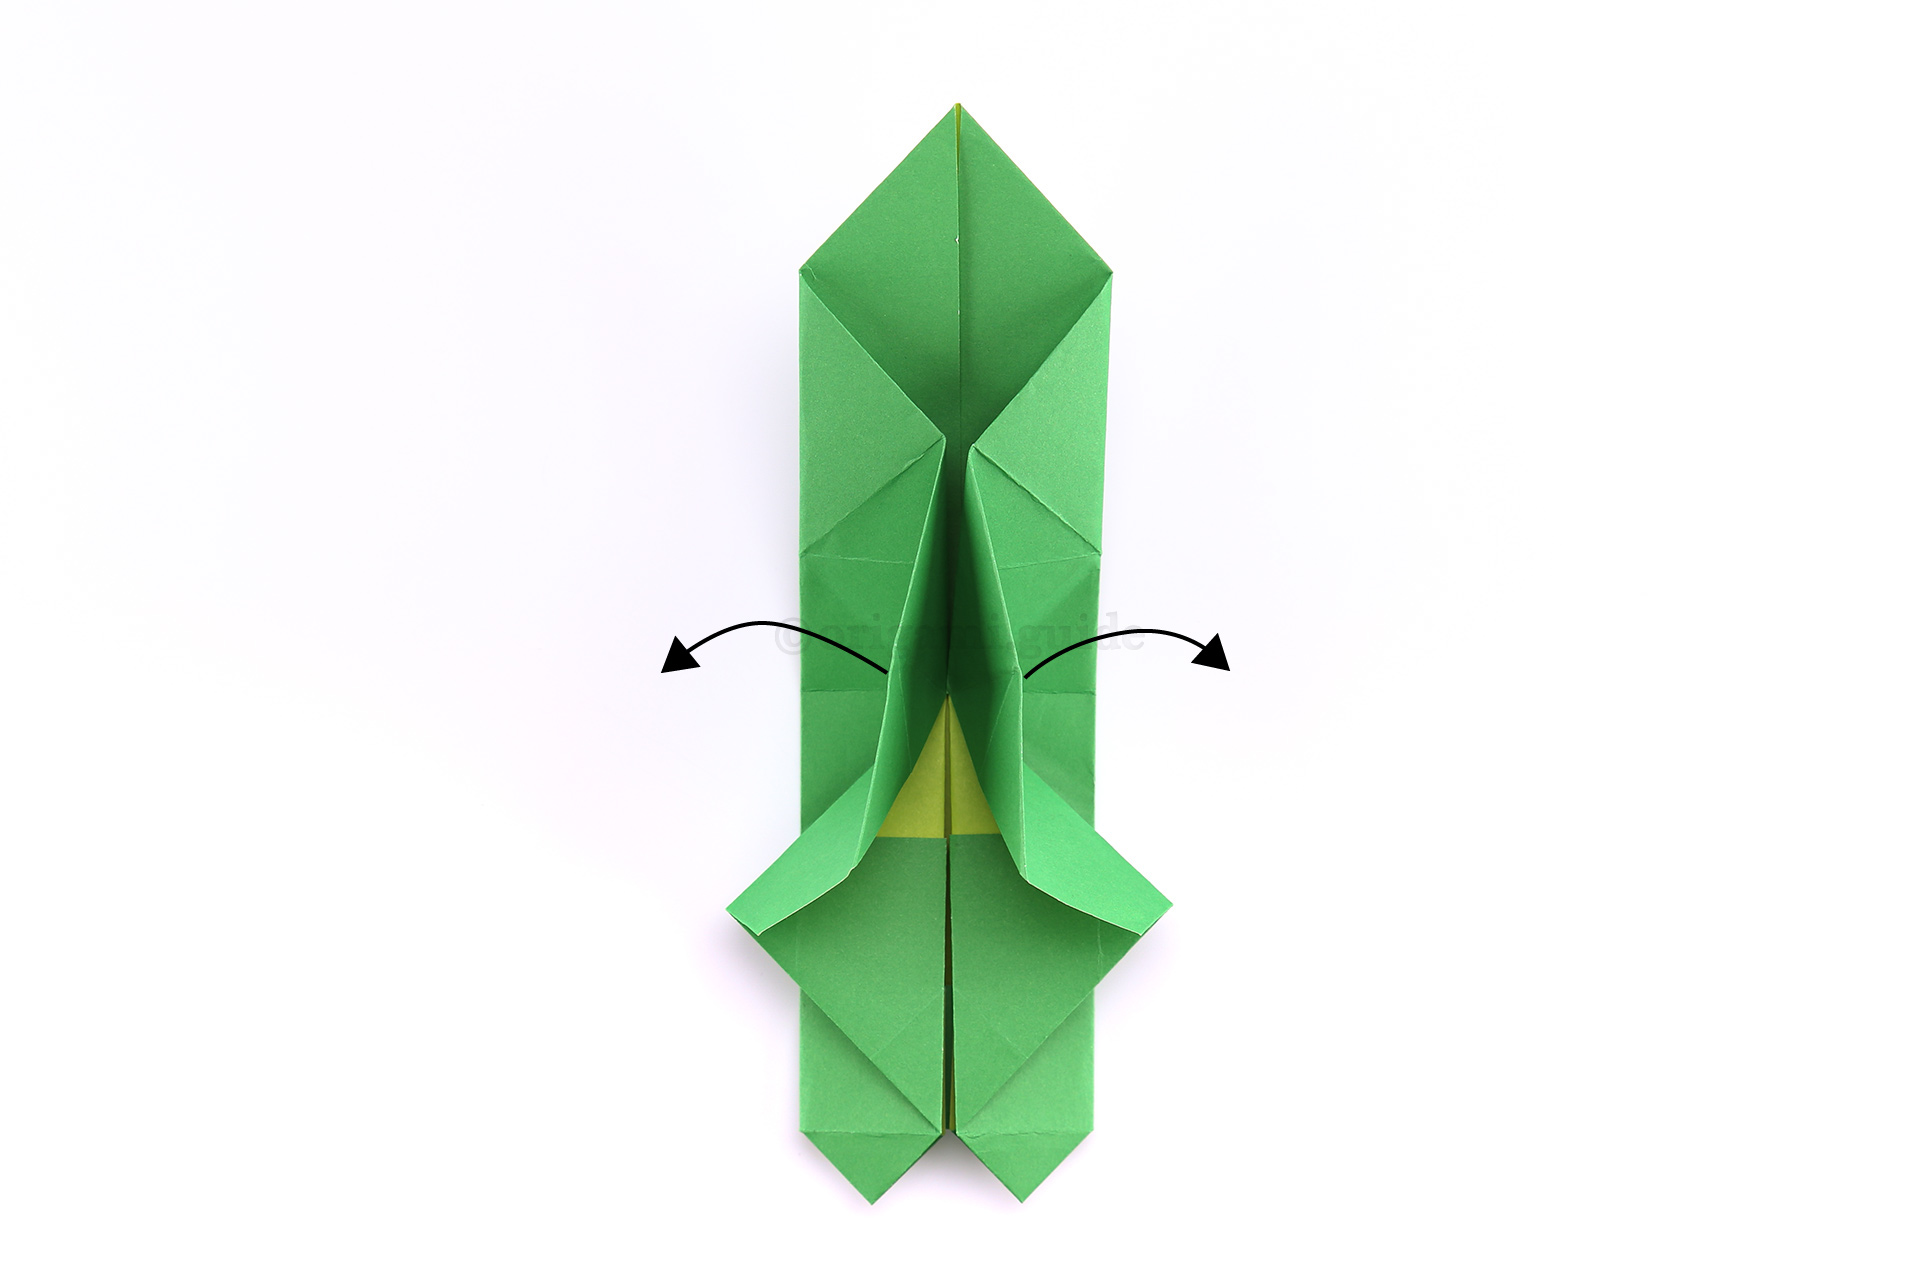
Step 35: Carefully pull the points indicated out, creating a diamond shaped hollow.
-
36
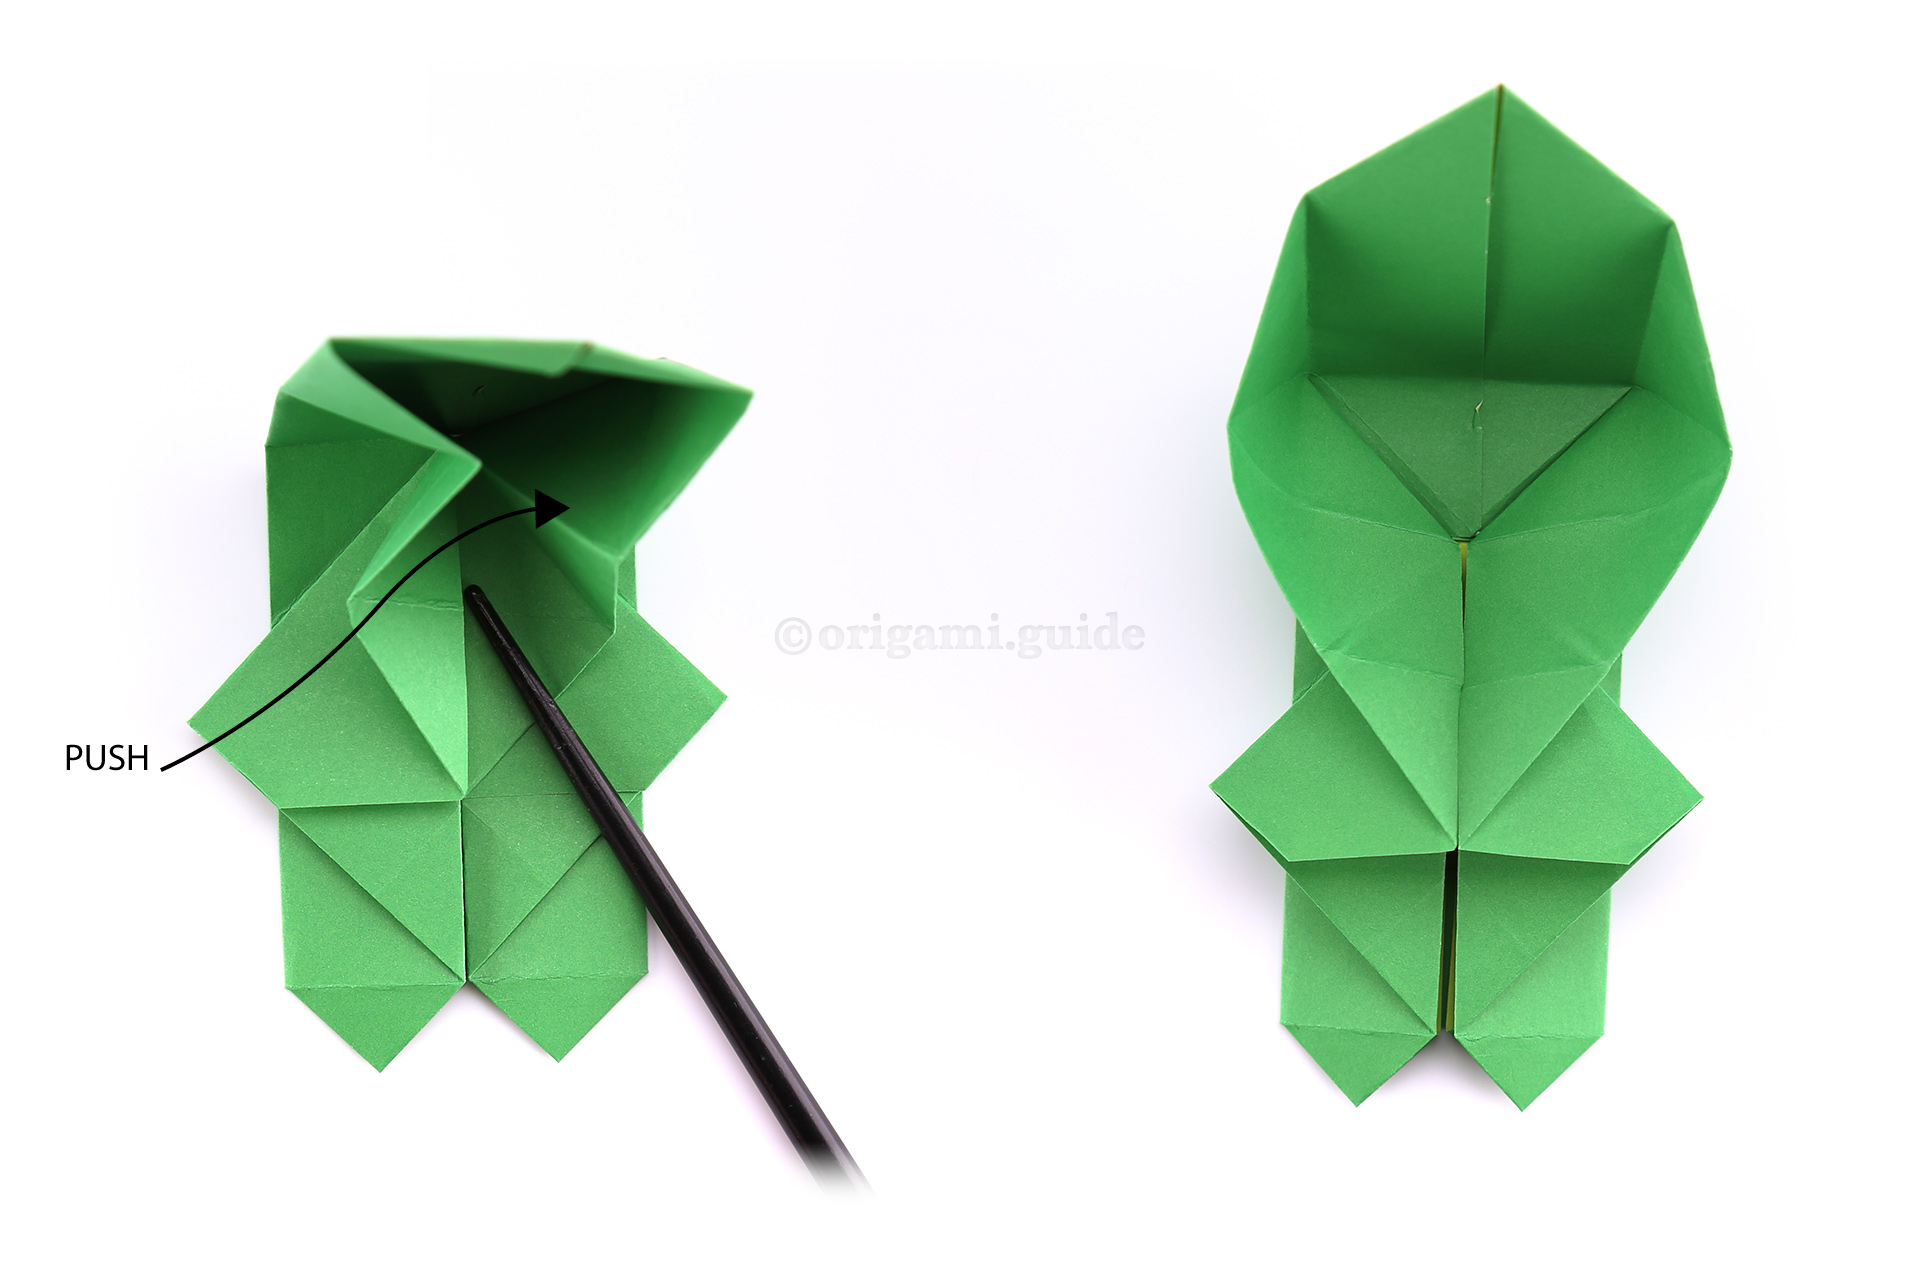
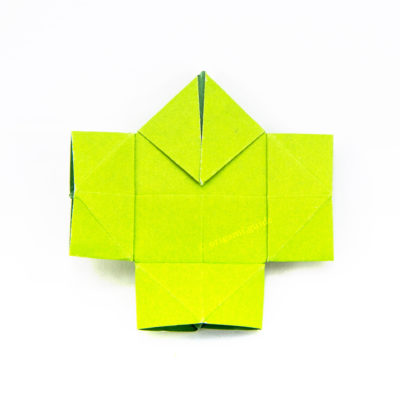
Step 36: Whilst bringing the top section forward and down, push on the area indicated. Flatten this area on both sides, creating quite a large square area as shown.
-
37
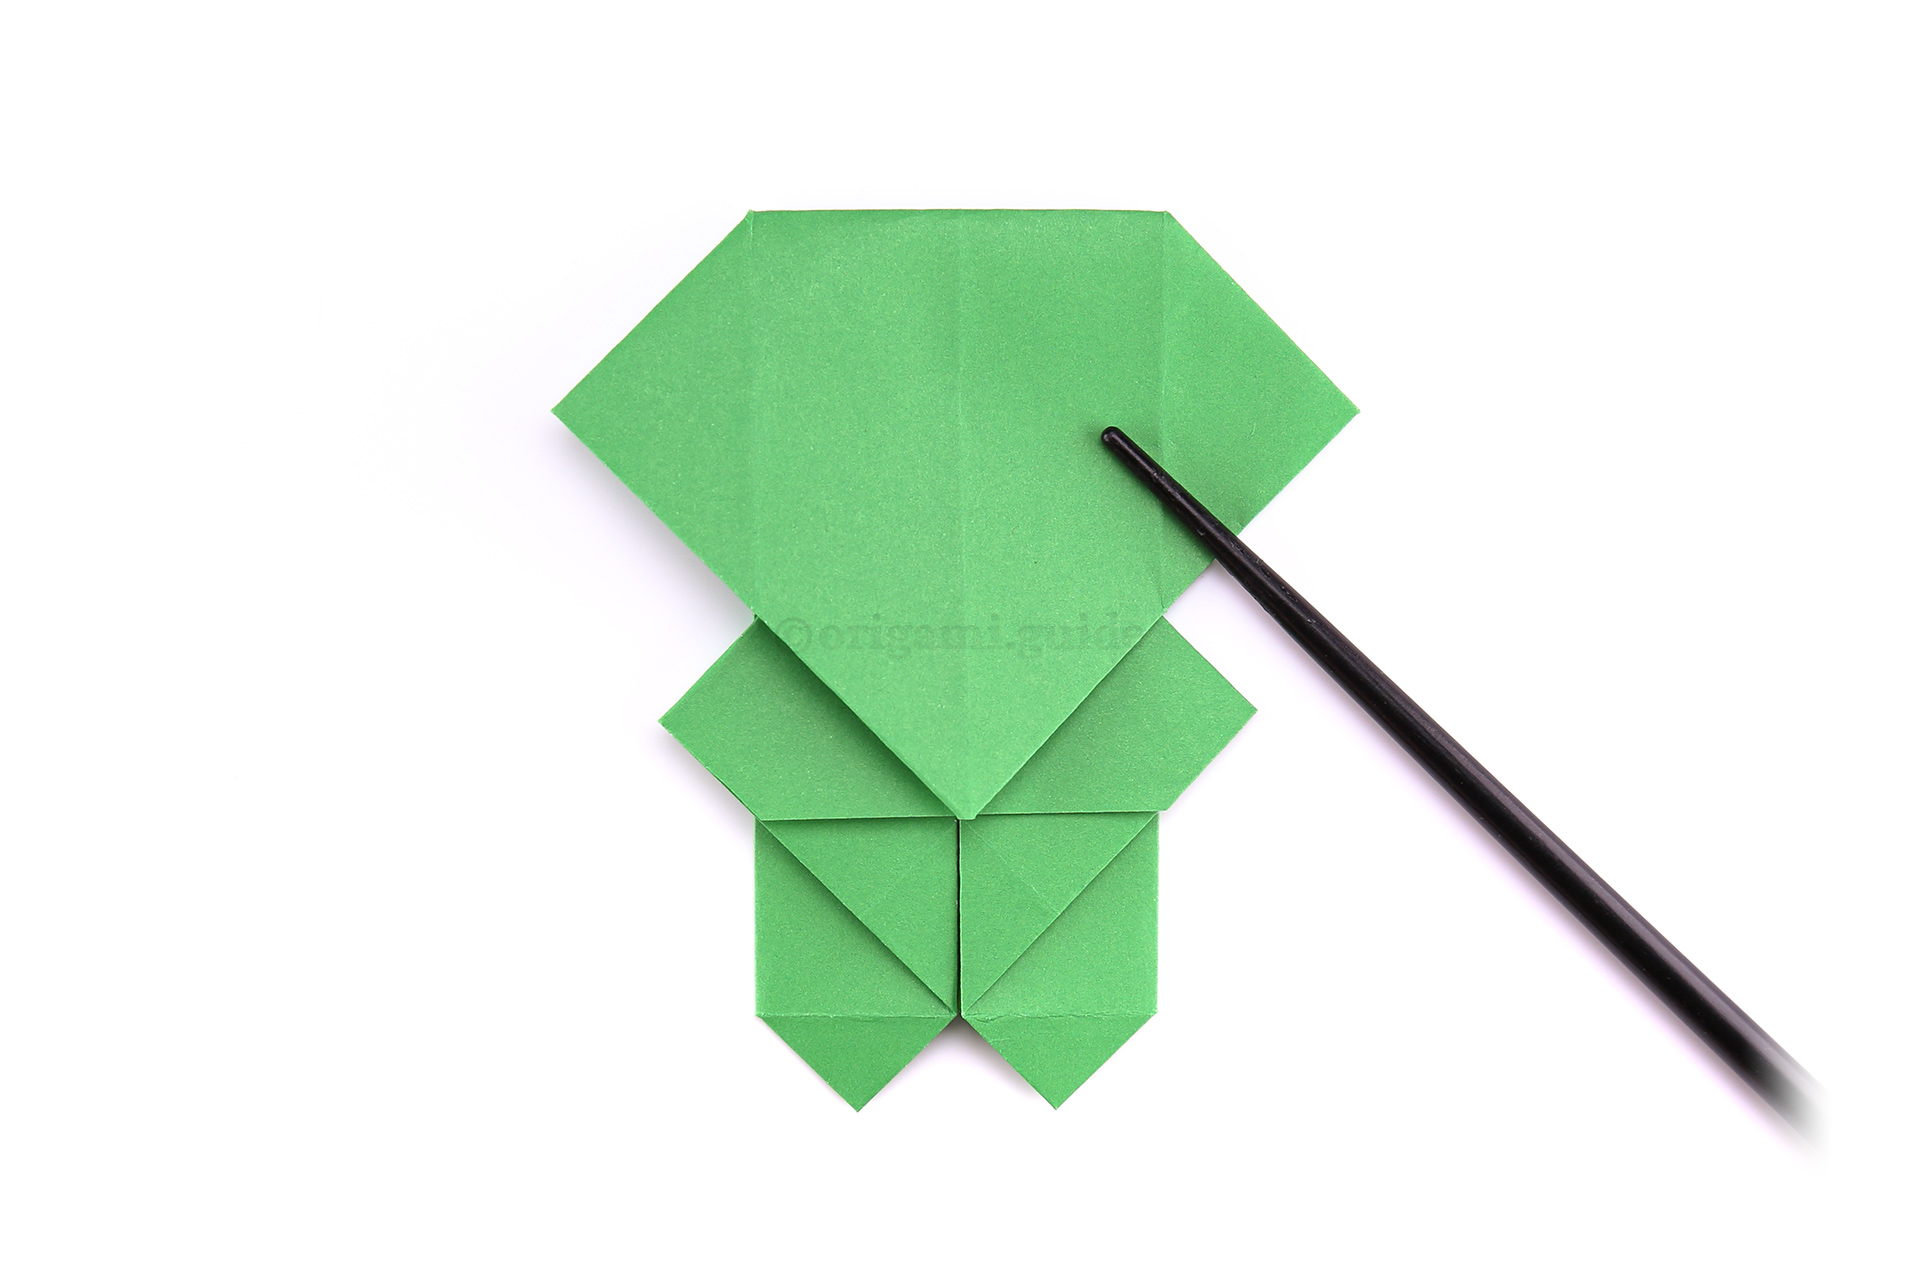
Step 37: Flatten the top flap down.
-
38
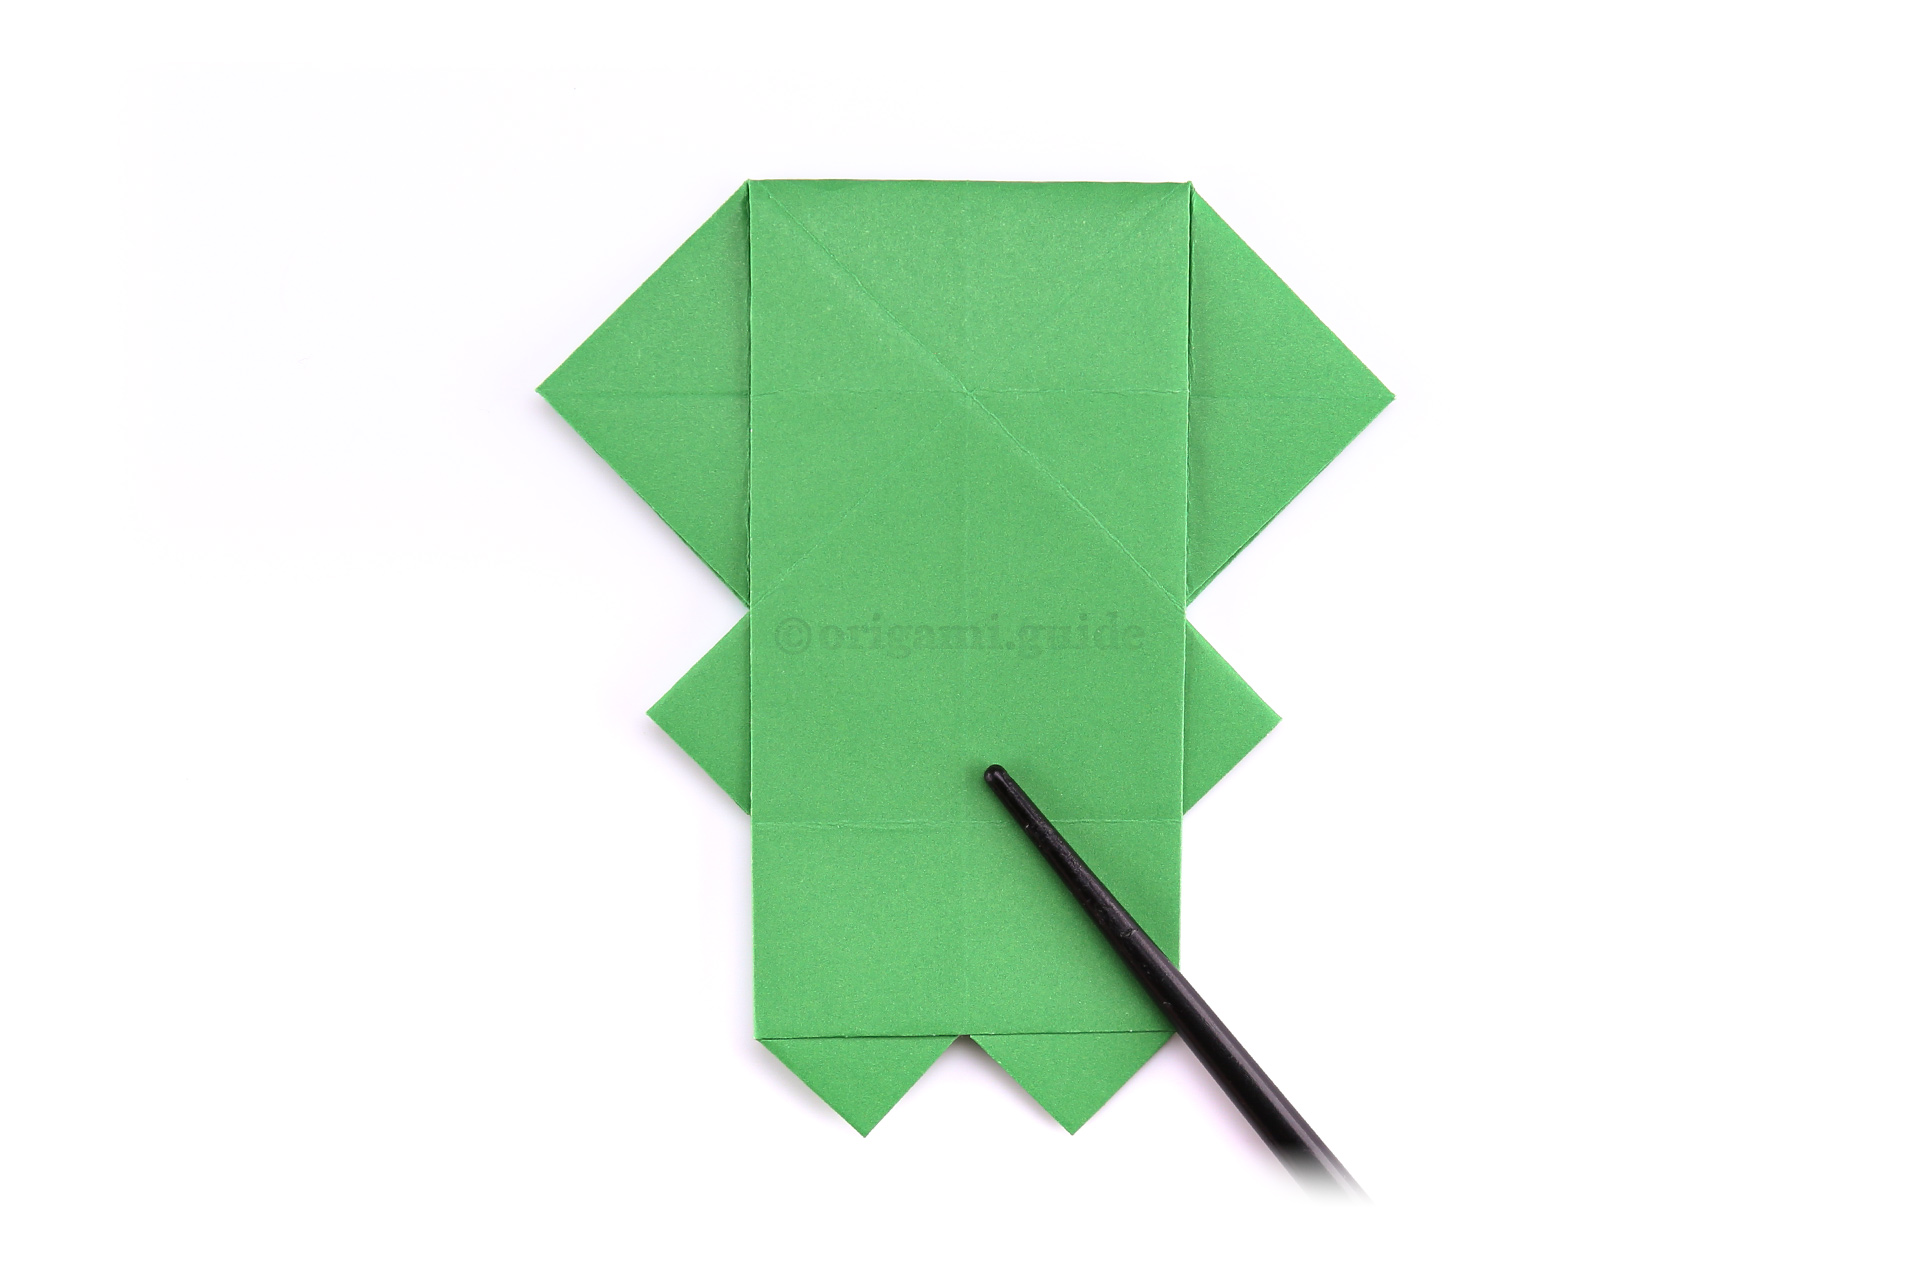
Step 38: Flip the paper over to the other side.
-
39
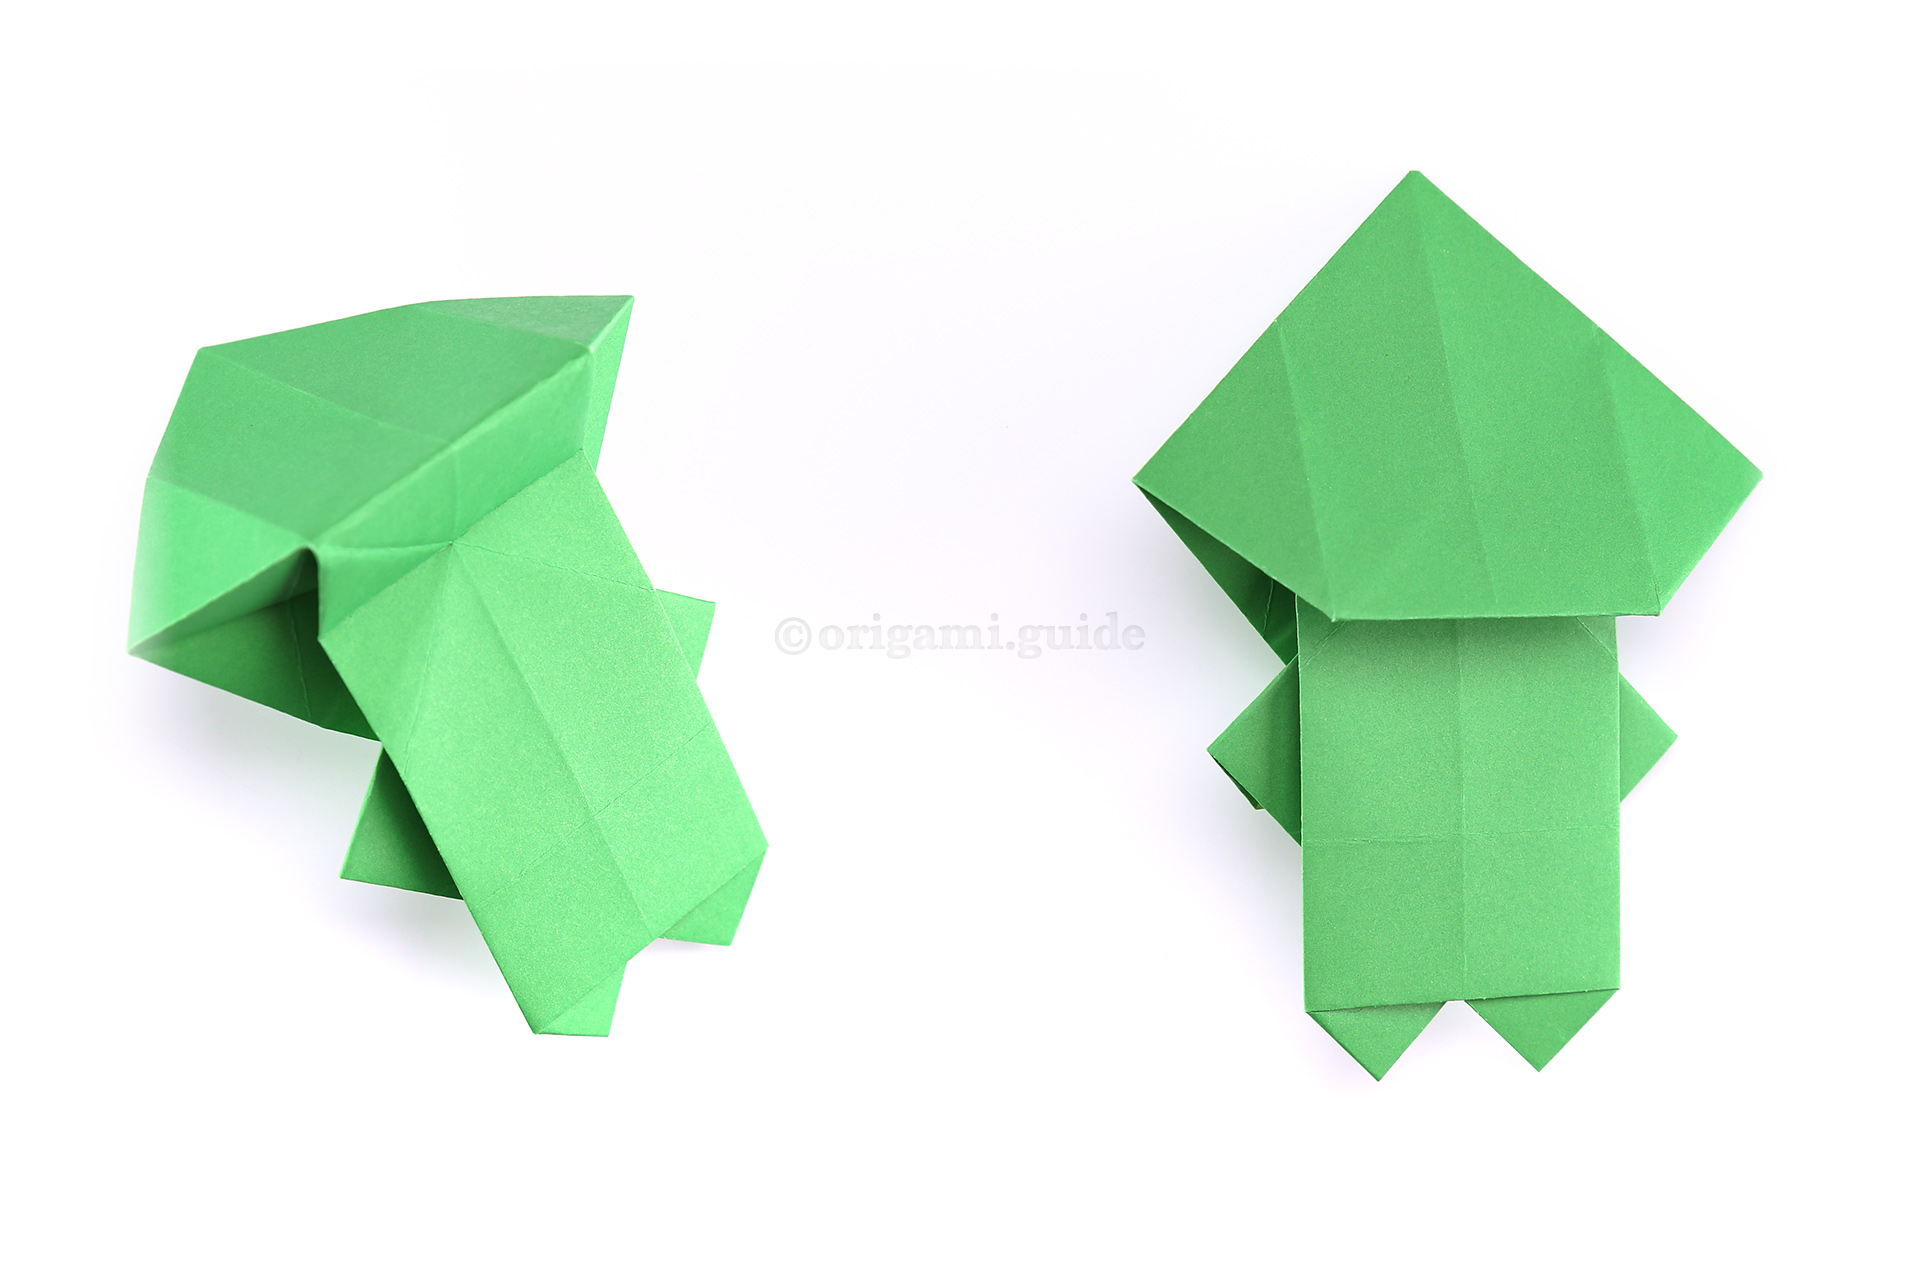
Step 39: Fold the top section down whilst bringing the flap up from behind.
-
40
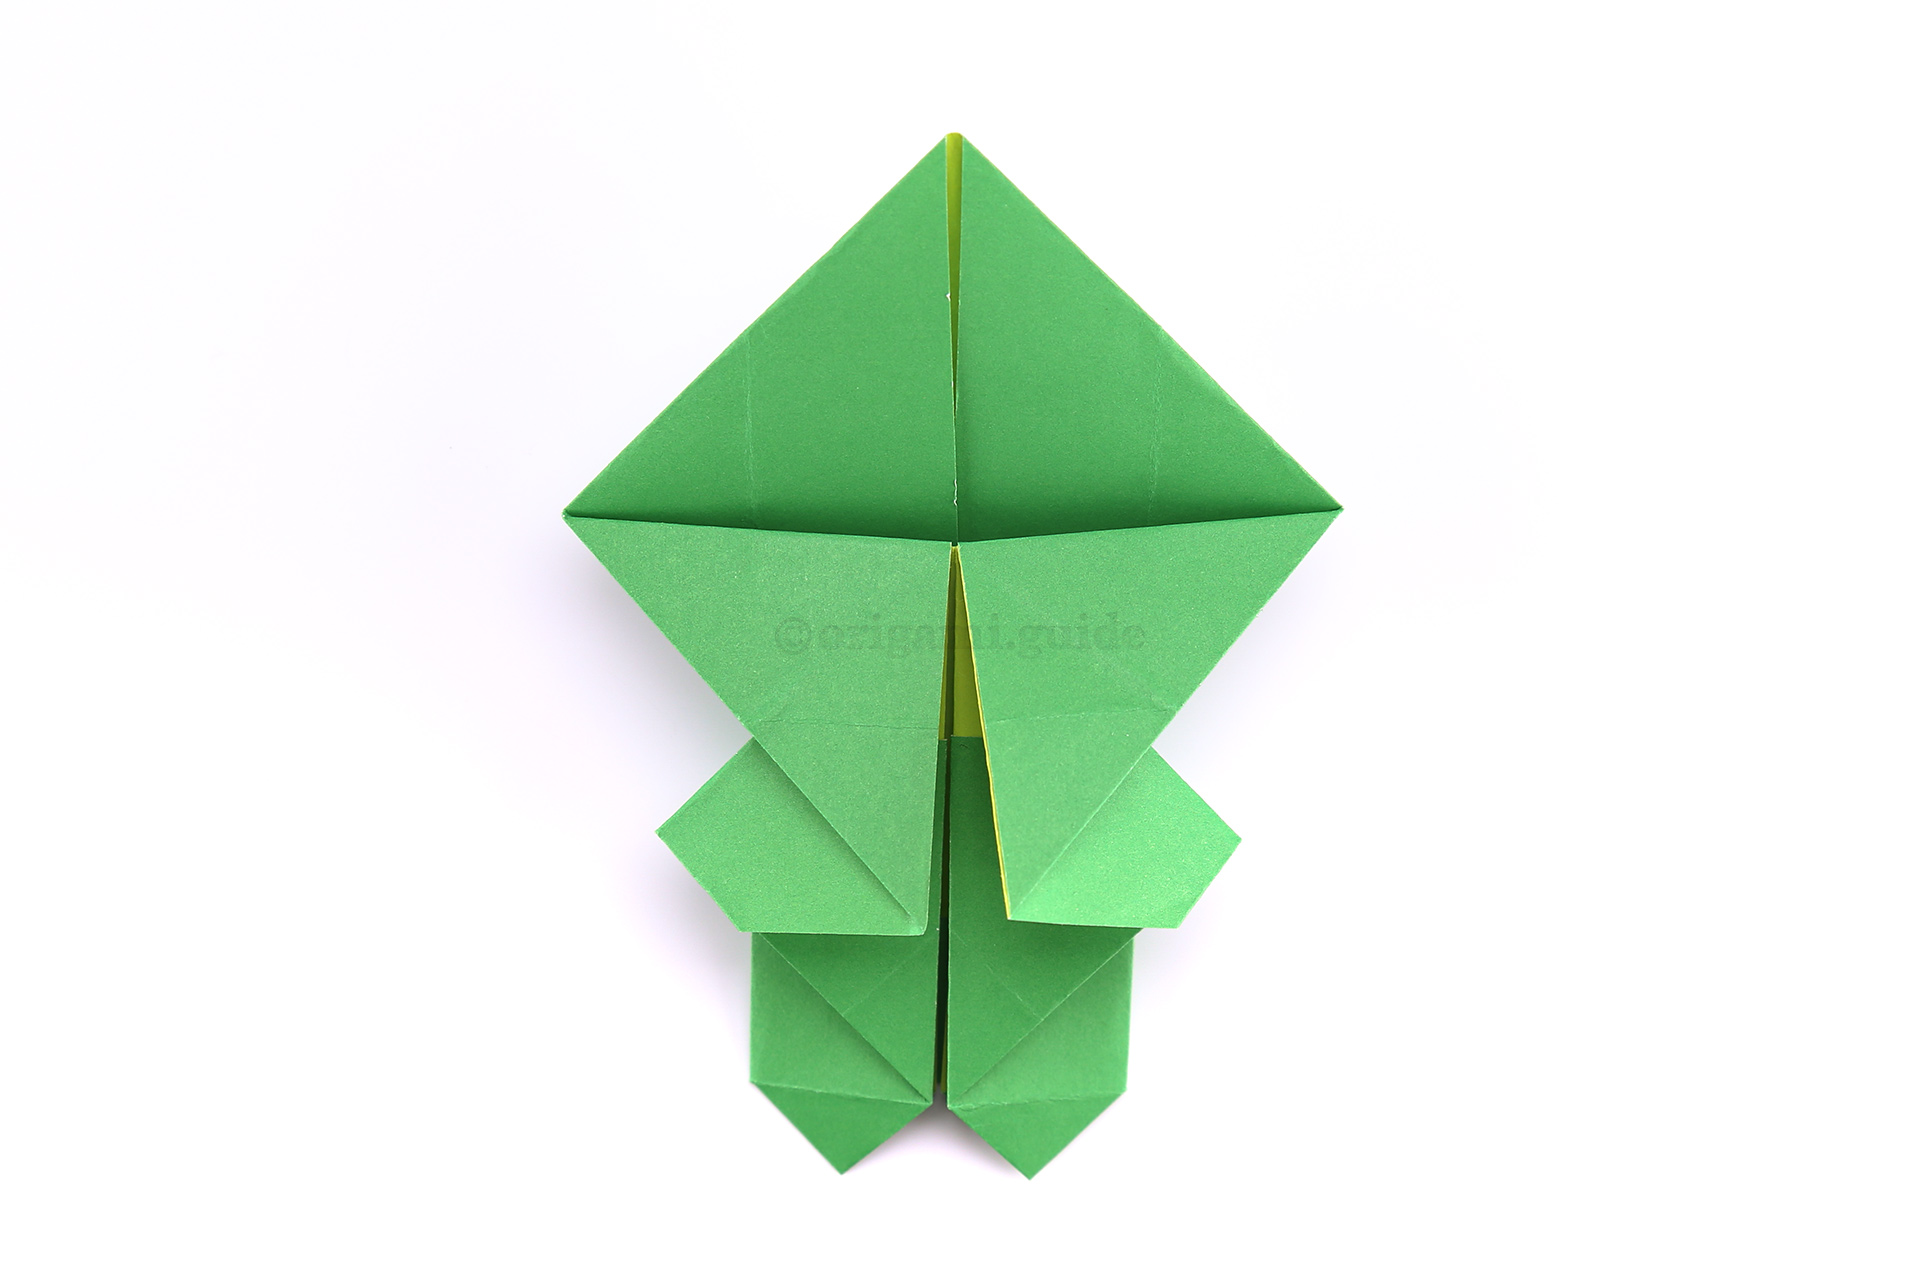
Step 40: Let's finish up the back.
-
41
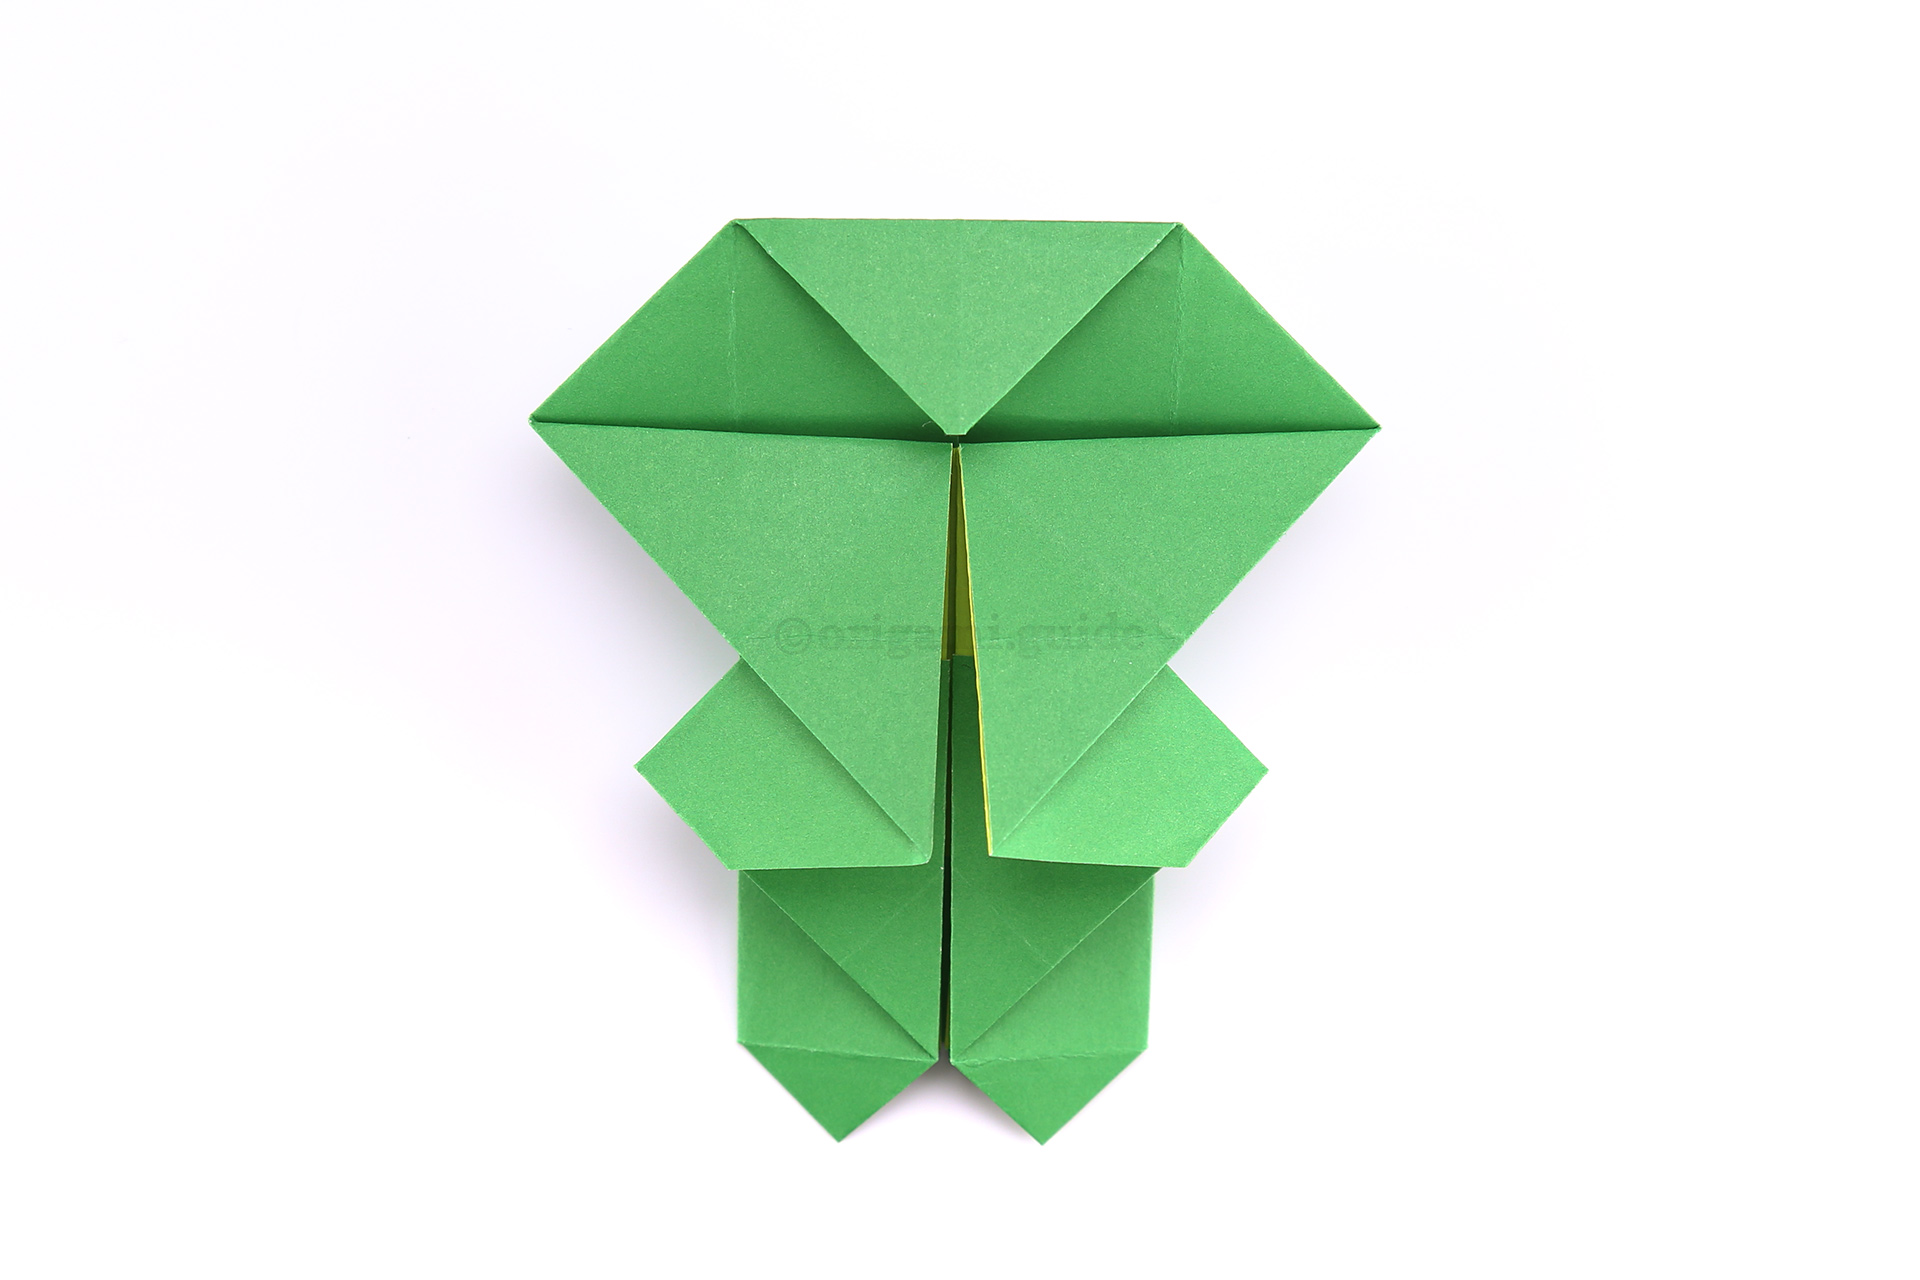
Step 41: Fold the top point down.
-
42
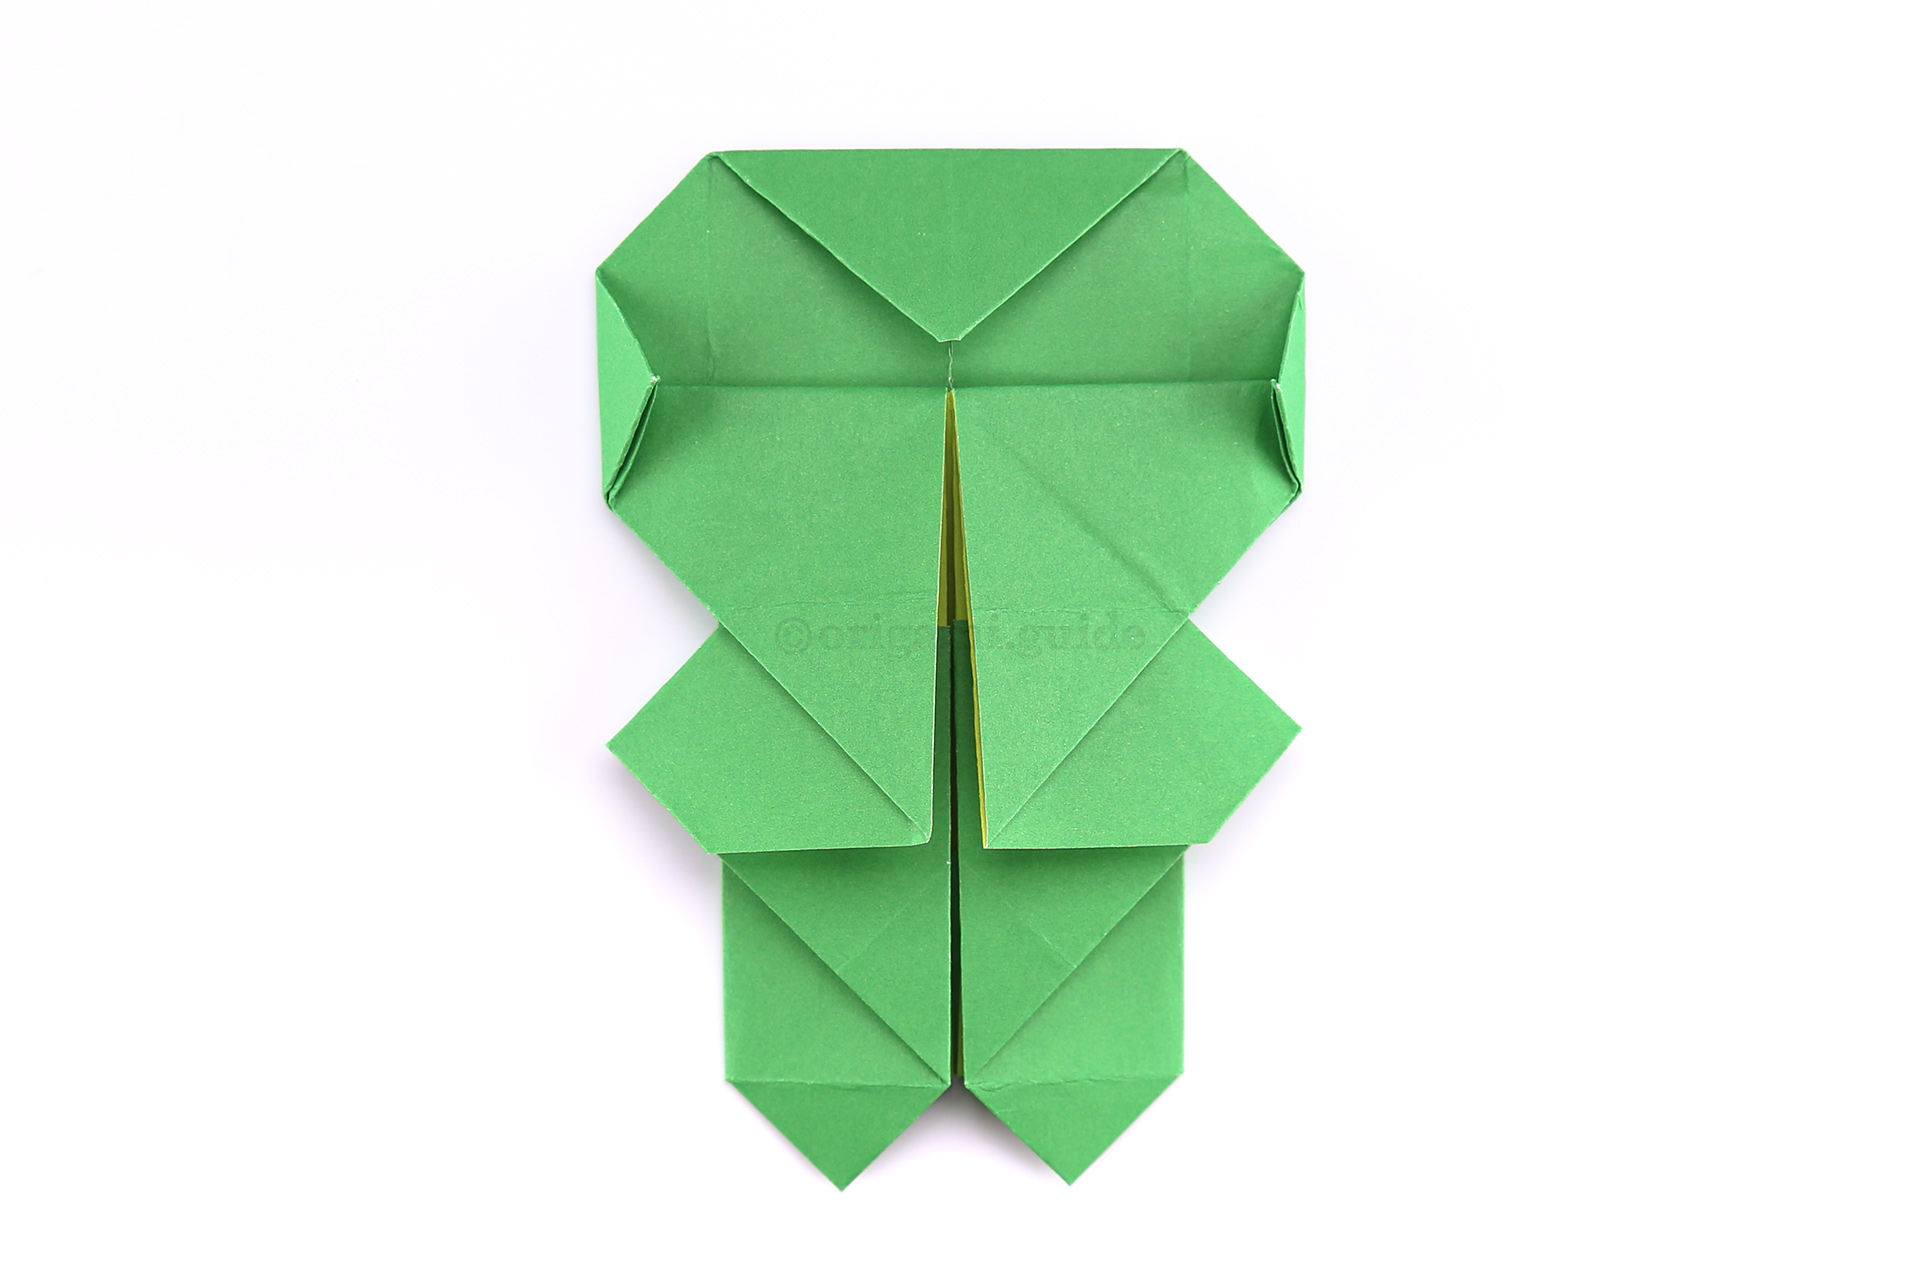
Step 42: Fold the left and right points a little, to create a more rounded head shape.
-
43
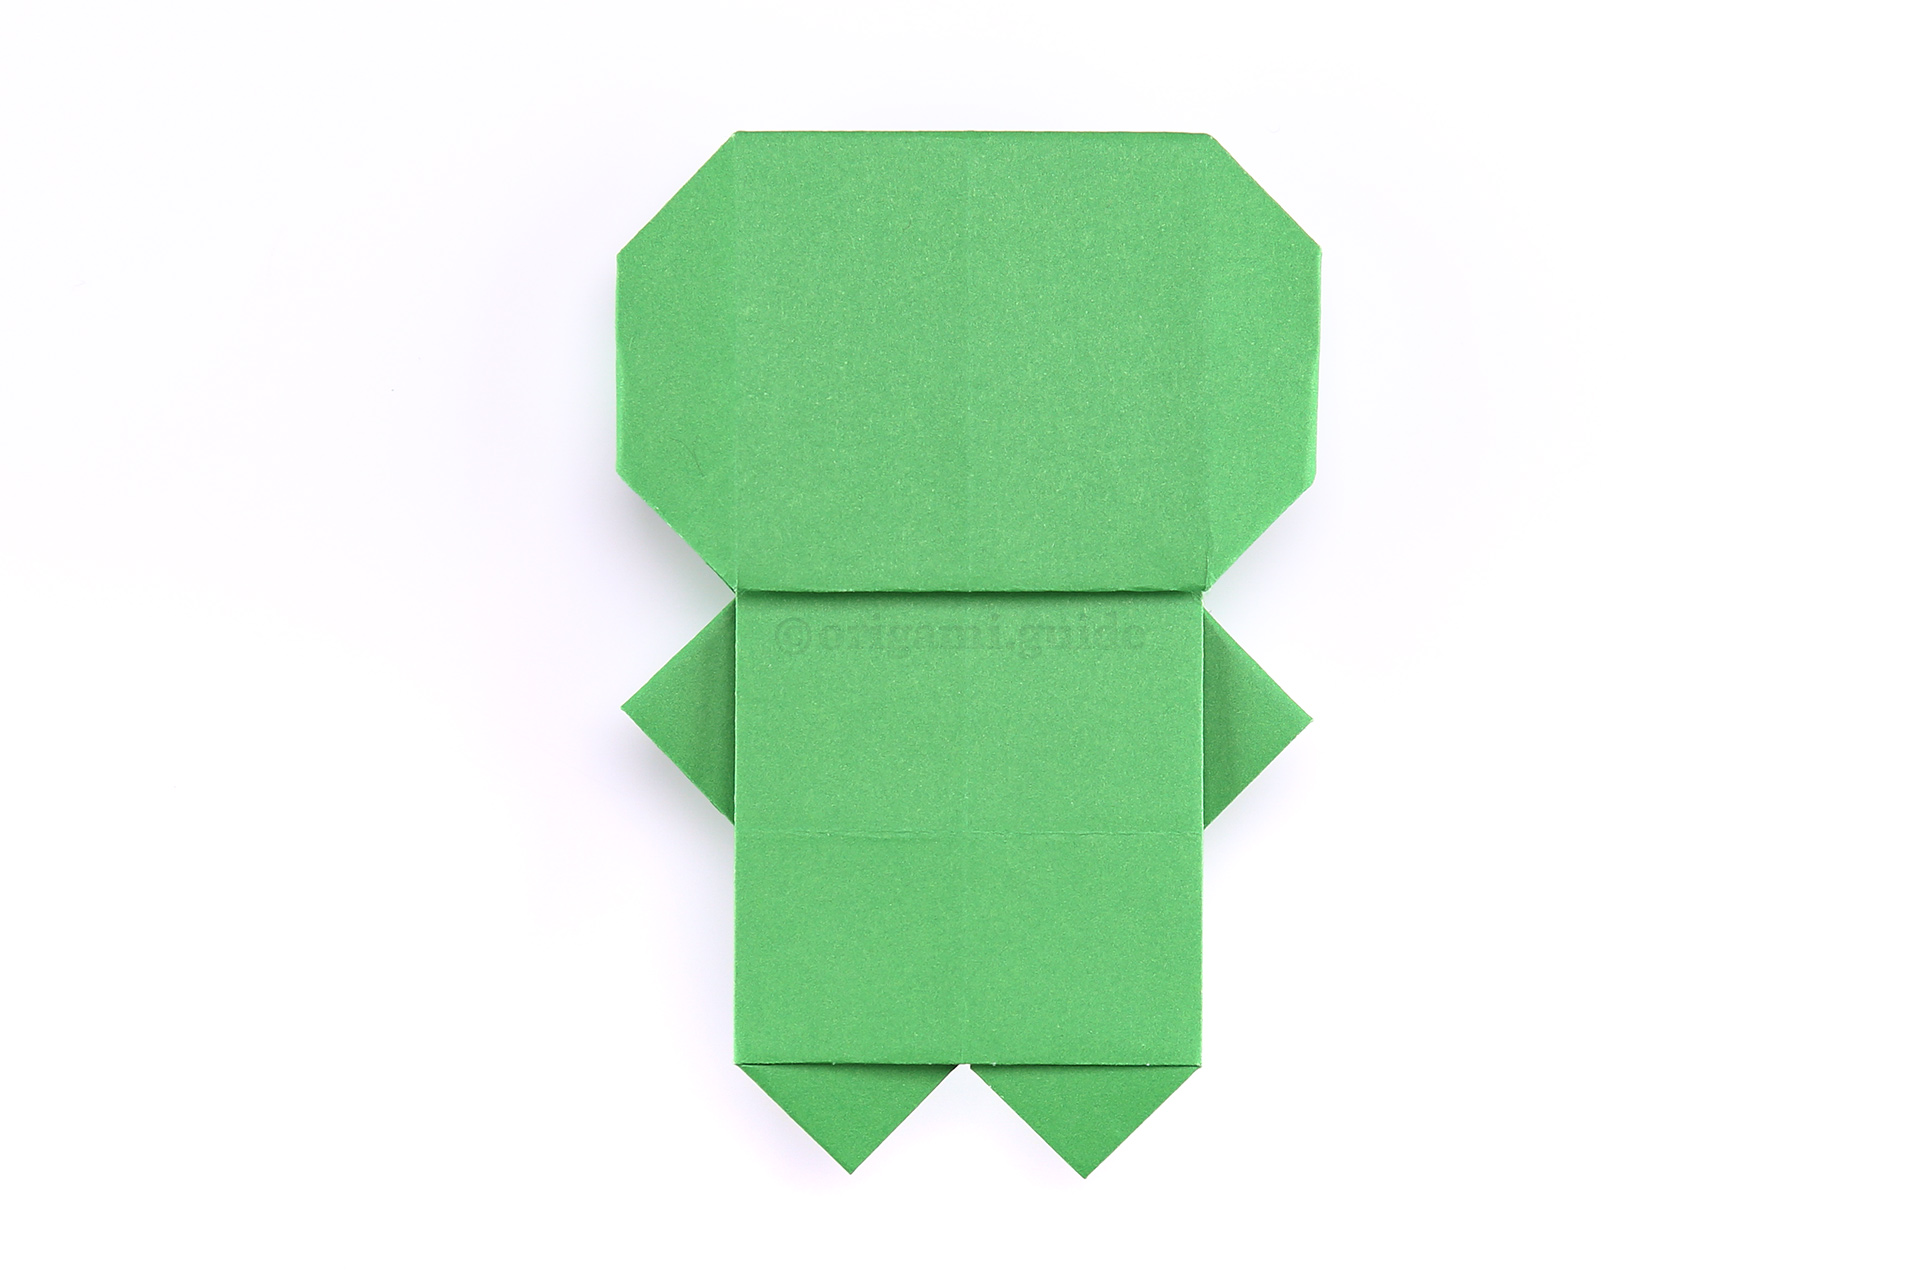
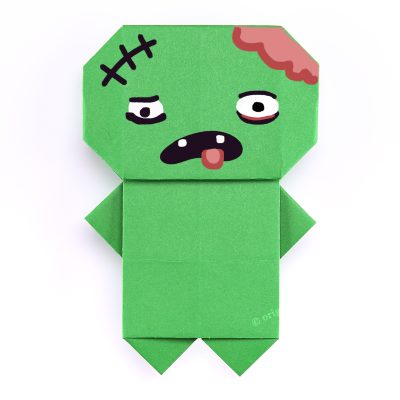
Step 43: Flip it over to the front, and here we have the finished origami figure.
-
44
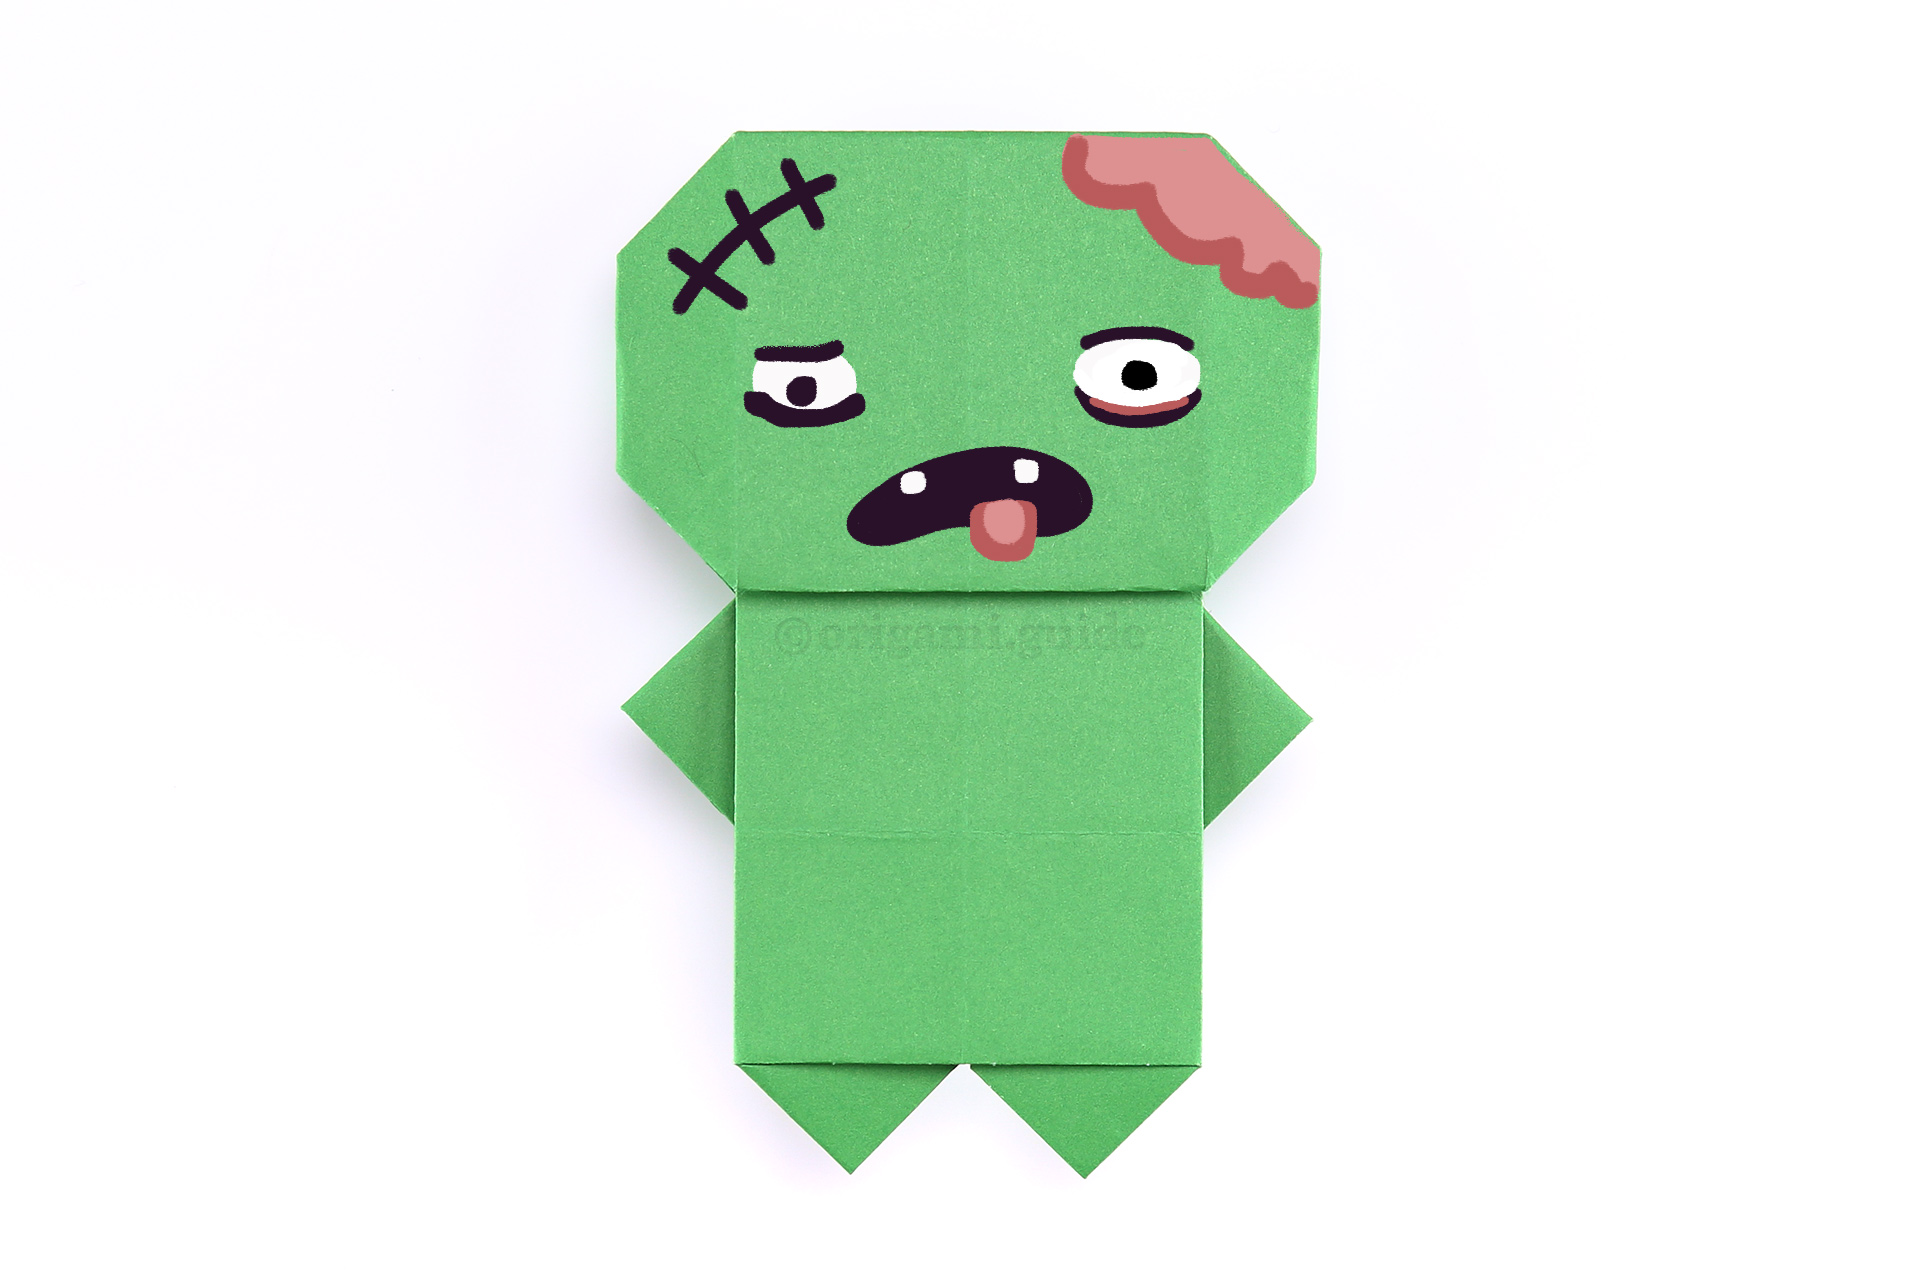
Step 44: Draw a creepy zombie face! We'd love to see your origami zombie in the comments!
Your Origami Zombie is Complete!
You’ve completed the Origami Zombie, why not check out our other Halloween Origami here.
Did you make this origami? How did it go? Leave a comment & submit your photo here.
Related origami: Intermediate Origami,
Origami Bookmarks,
Halloween,
What Halloween Origami To Fold Next?
View all Halloween Origami Tutorials




Leave A Comment
Did you fold this Origami Zombie? Let us know what you thought.
You can also upload a photo of your result!